
Hand sewn button loops and rouleau loops are such a pretty way to fasten a garment, particularly when a feminine finish is required or when working with delicate fabrics. They are ideal for the pretty summer garments we are all working on right now and are relatively easy to master so I wanted to share the love! Here is a little step by step guide on how to create them.
Inspiration for Hand Sewn & Rouleau Button Loops
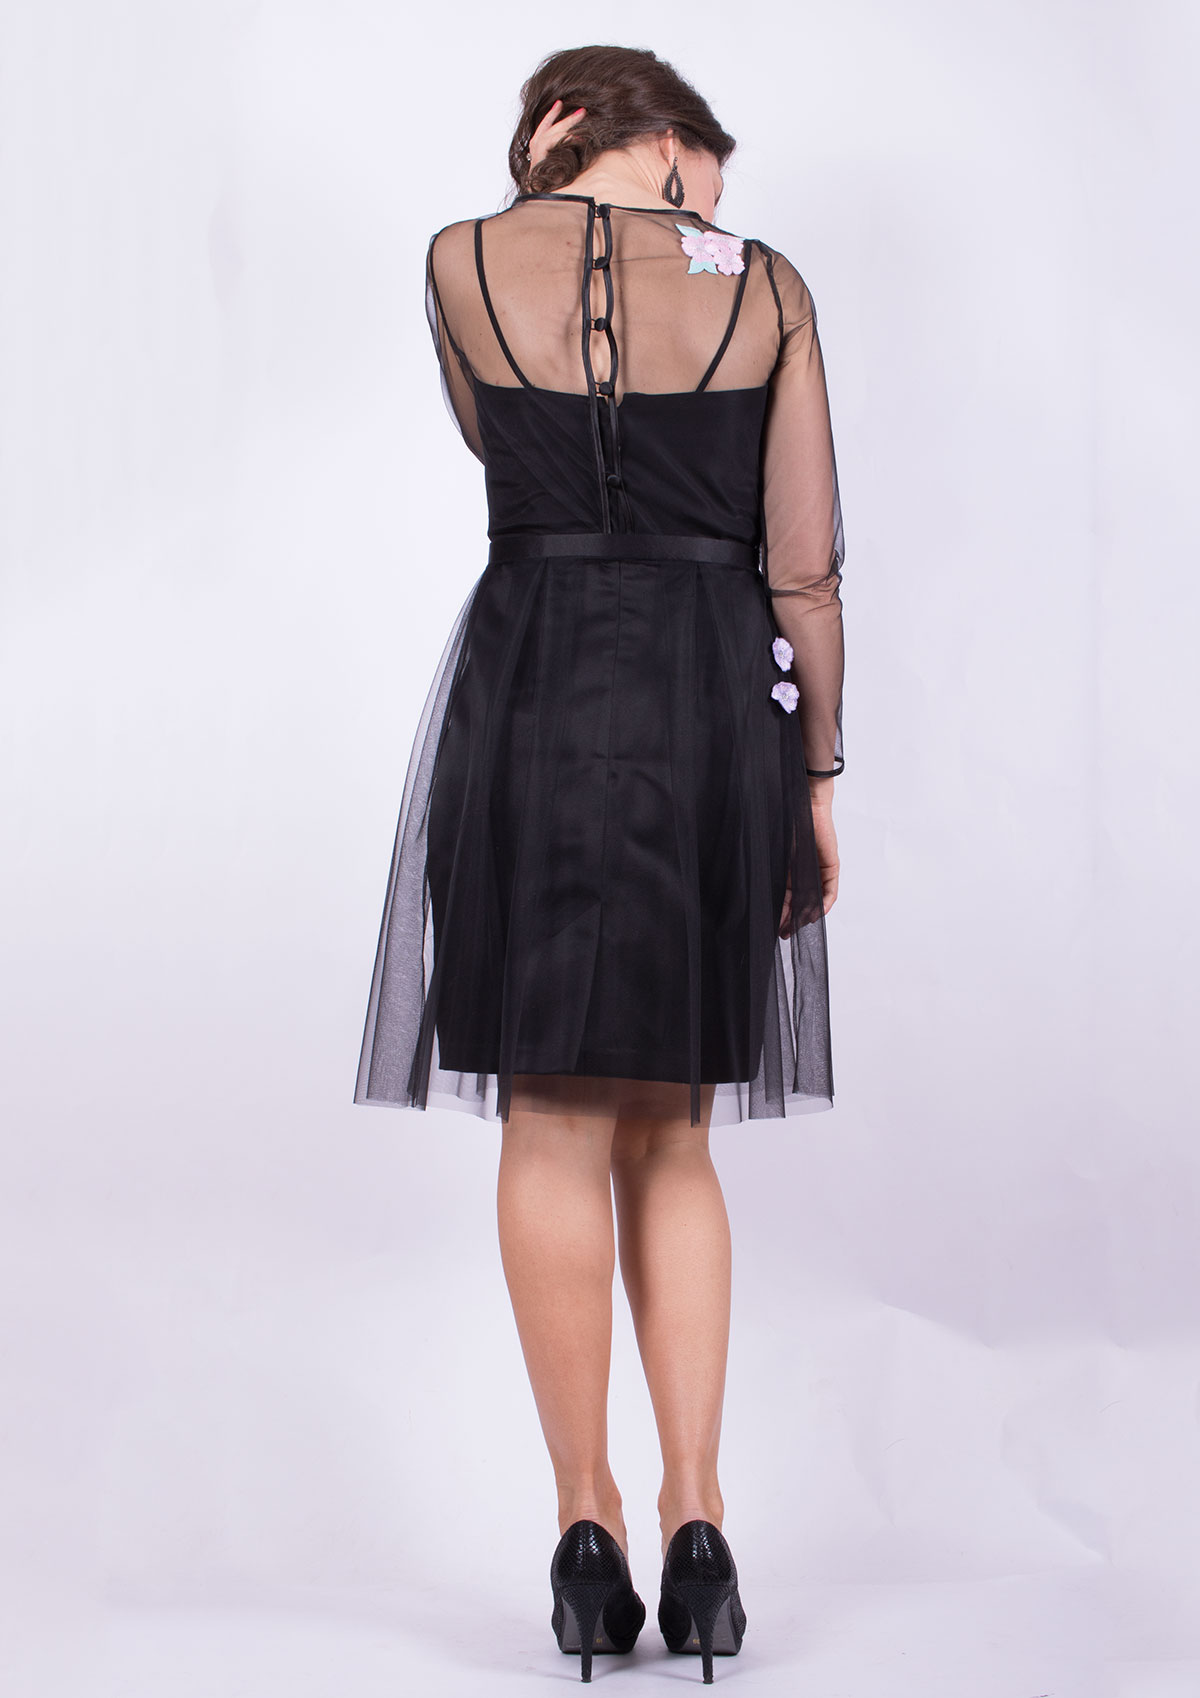
We've all seen button loops on formal occasion wear. In fact, Angela sewed several hundred down the back of my wedding dress and bridesmaid dresses many moons ago!

And I used them on my cocktail hour dress too.

However, these pretty and decorative fastenings can transform everyday wear from dull to dazzling. Use them on skirts, tops, dresses and anything else you fancy prettying up!

How to Hand Sew Button Loops
I chose a contrasting thread to make it easily visible, just in case anyone is questioning my colour matching skills or sanity!
Positioning the Loop
Sew the
buttons onto the garment.
Line the opening of your garment up accurately so the finished edges meet at the top.
Use
pins to mark where the loop should begin and end. This should be just underneath the edge of the button so it will remain closed when fastened.

Sewing the Loop
Thread a
needle with a double thickness of
thread and tie a knot in the end.
Push the needle from the wrong side to the right side at your bottom pin marking.

Take it up to the top pin marking and push it through from the wrong side and down along the inside of the finished edge until you reach the bottom pin marking. Bring the needle out just next to where you first entered the fabric.

Now you have created a loop, test it to make sure it is the right size for your button. It should be a snug fit, but not so tight you can't fasten it.


Once you are happy with the size of the loop repeat the steps again to double the thickness of the loop. Take care not to alter the size of the initial loop by resting your finger against it if necessary.
Finishing the Loop
Now it is time to add strength to the loop and make it look pretty by sewing blanket stitches.
Take the needle through the loop you have created.
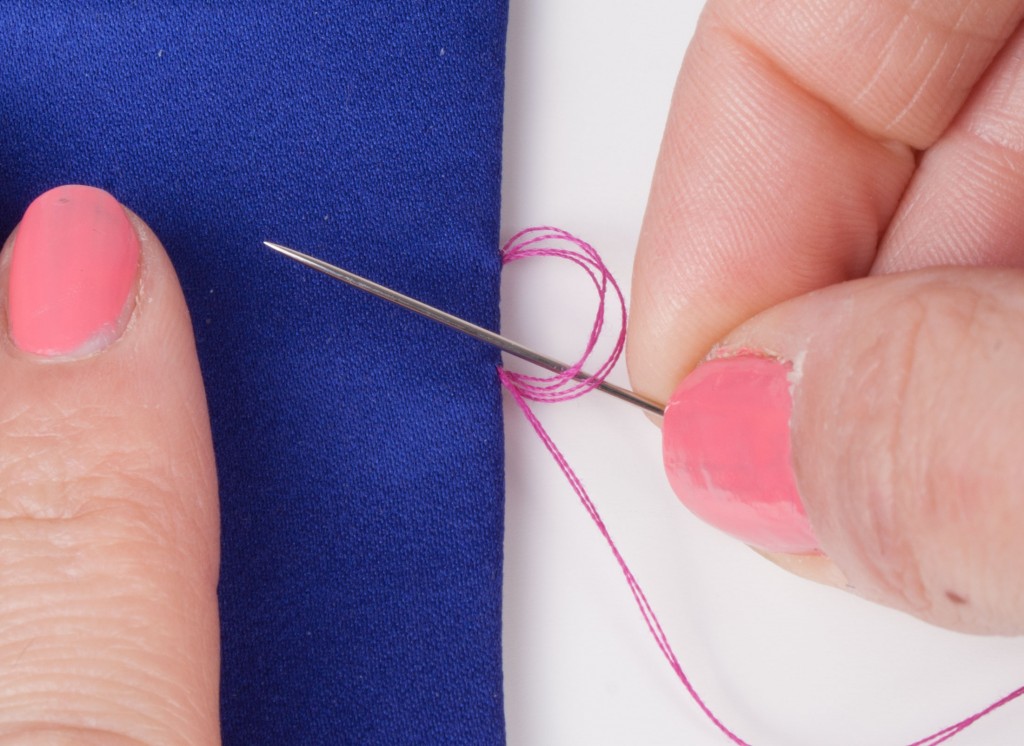
This will form another loop - pass the needle back through the new loop.

Gently pull the needle until a small knot is formed around the original button loop making sure it sits next to the finished edge of your garment.

Continue to repeat the process until you have worked your way around the entire loop. The knots should be neatly butted up against one another.
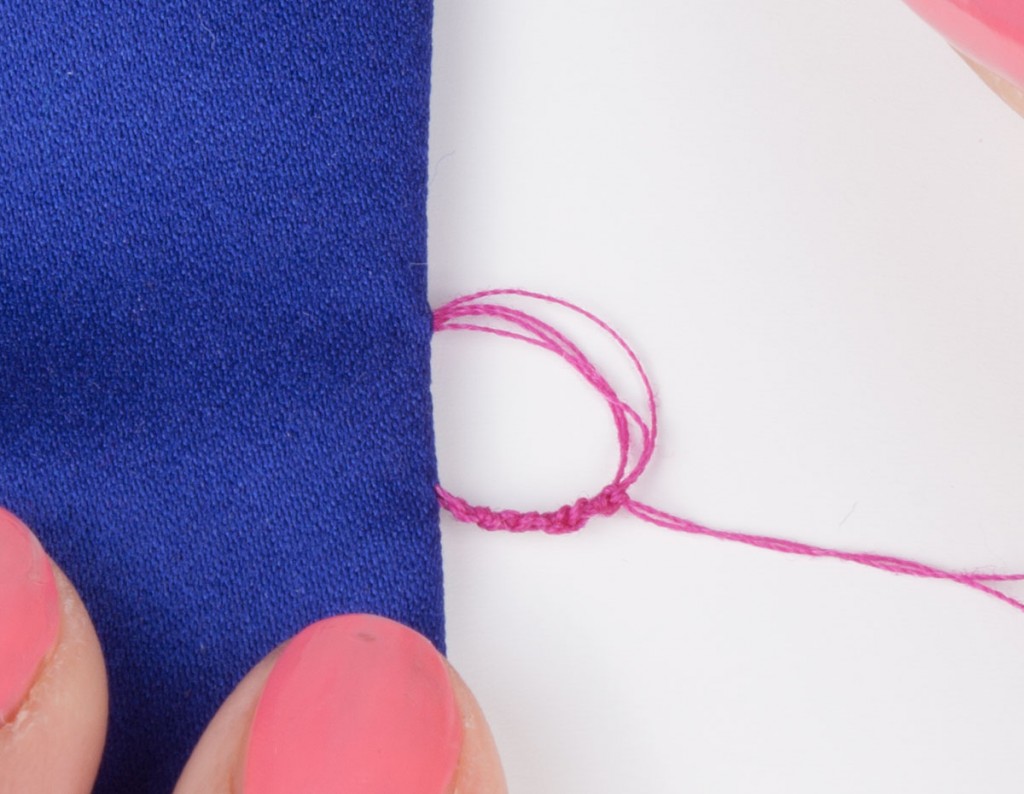
Due to the double thickness of the thread it will easily tangle. Take care to avoid this and if it does happen gently pull each thread individually to correct the problem.
Also take care to sew each stitch in the same direction to achieve a neat finish.
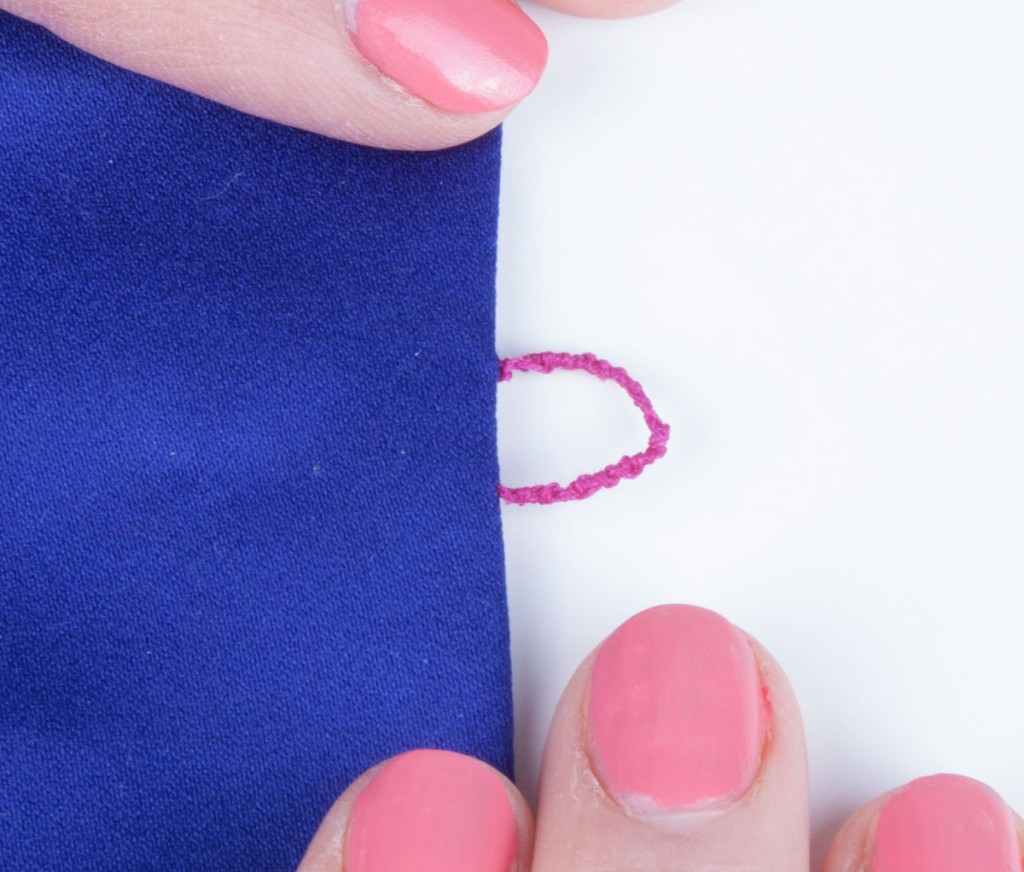
Finally secure the loop to the garment with a stitch and knot the thread.
How to Sew Rouleau Loops
Creating a Rouleau Strap
First you will need to create a rouleau strap. This will be used to create your button loops and attach them to your garment.
Measure the length of the opening of your garment and add on enough fabric to create each loop. Use your buttons as a guide to work out how large each loop will need to be. Add an extra few inches on to your final calculation - you can always trim this off later.
Cut a strip of fabric on the bias - this will help to shape the curves more easily. Fold it in half lengthways and pin it in place with your raw edge on the left hand side as you look at it.
Stitch 1/4" away from the folded edge and trim the seam allowances down to be as narrow as possible.

Use a
loop turner to turn the strap the right way.
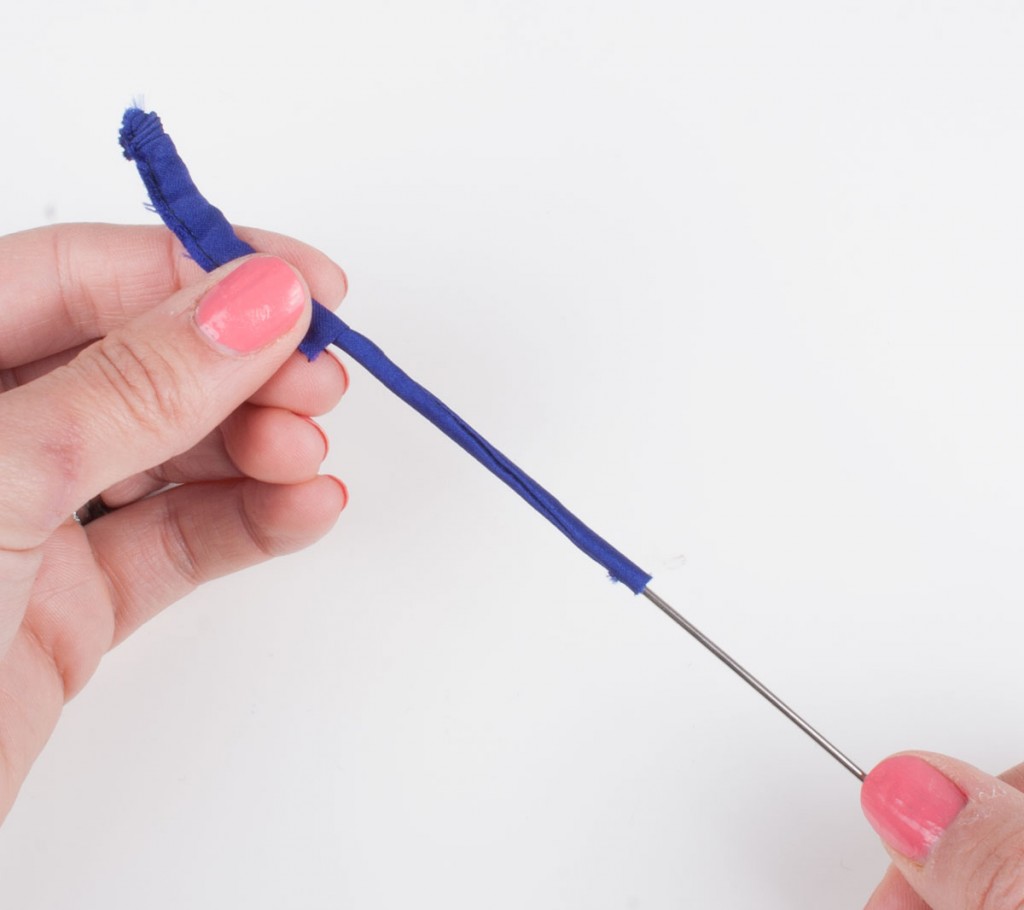
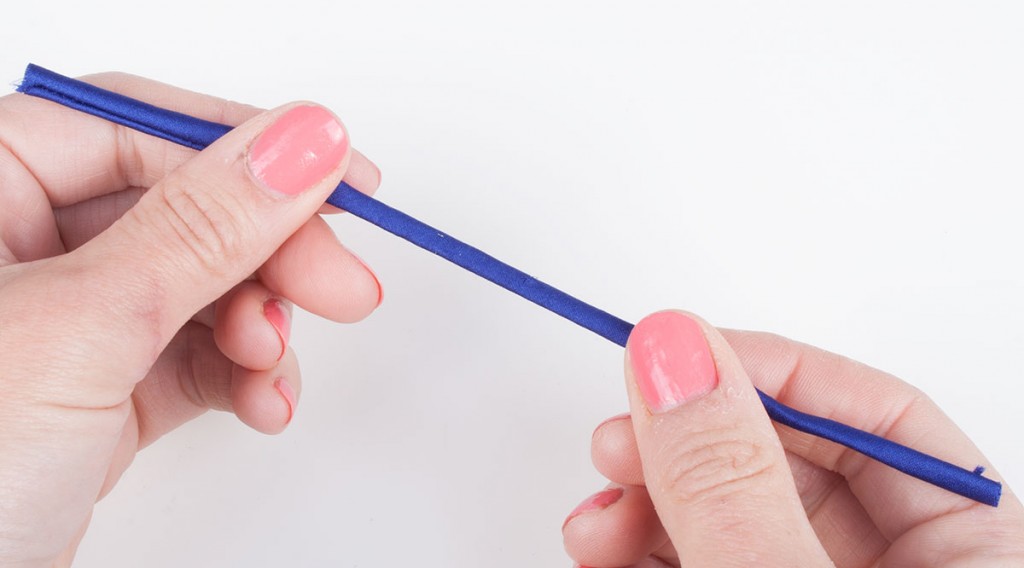
You now have a finished rouleau strap which should look something like this.
Positioning and Creating the Rouleau Loops
Sew the buttons onto the relevant side of your garment and cut a strip of narrow
ribbon the length of the opening.
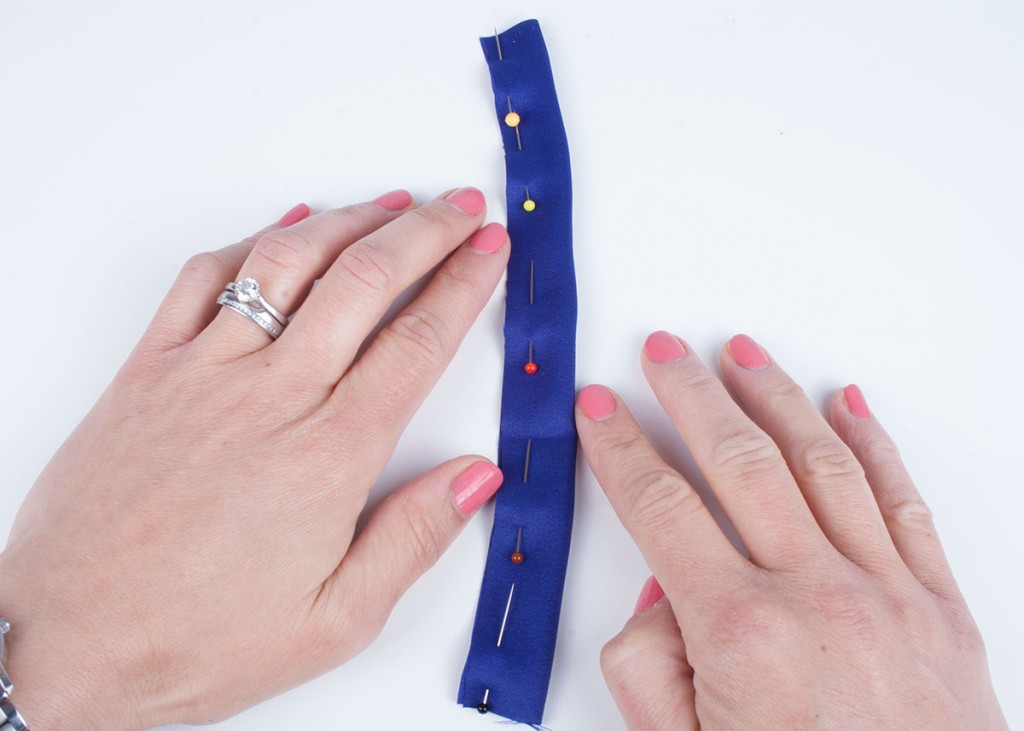
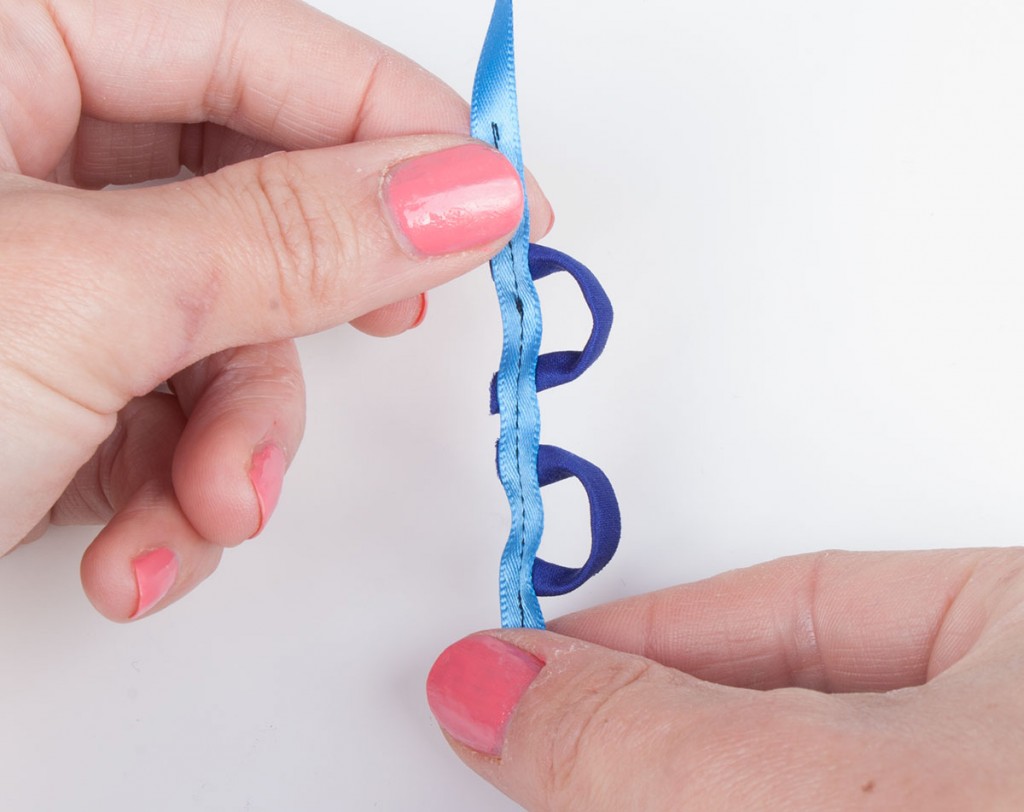
Lie the ribbon next to the edge with the buttons. Mark the ribbon where the rouleau loops should begin and end with chalk.
Starting at the top pin the rouleau strap in place working it into a loop at the relevant points. Also create a loop on the opposite side of the ribbon to help you work round the curves, a sort of snake effect.

Make sure the seam is on the side of the loops that won't be visible.
Stitch down the centre of the ribbon to secure the loops and trim off the loops from the opposite side.
Insert the ribbon into your seam allowance before sewing the seam.
We hope you've enjoyed our little tutorial and here's to lots of pretty summer sewing!
Have fun sewing!
Lucy
For more tips and tricks on how to make
sewing easy you can follow our blog via
Bloglovin and receive updates via email each time a new post is added.
Follow us on
Facebook Twitter YouTube and
Instagram for news, tutorials, special offers, sales and more.
 And I used them on my cocktail hour dress too.
 However, these pretty and decorative fastenings can transform everyday wear from dull to dazzling. Use them on skirts, tops, dresses and anything else you fancy prettying up!


 Take it up to the top pin marking and push it through from the wrong side and down along the inside of the finished edge until you reach the bottom pin marking. Bring the needle out just next to where you first entered the fabric.
 Now you have created a loop, test it to make sure it is the right size for your button. It should be a snug fit, but not so tight you can't fasten it.

 Once you are happy with the size of the loop repeat the steps again to double the thickness of the loop. Take care not to alter the size of the initial loop by resting your finger against it if necessary.
 This will form another loop - pass the needle back through the new loop.
 Gently pull the needle until a small knot is formed around the original button loop making sure it sits next to the finished edge of your garment.
 Continue to repeat the process until you have worked your way around the entire loop. The knots should be neatly butted up against one another.
 Due to the double thickness of the thread it will easily tangle. Take care to avoid this and if it does happen gently pull each thread individually to correct the problem.
Also take care to sew each stitch in the same direction to achieve a neat finish.
Due to the double thickness of the thread it will easily tangle. Take care to avoid this and if it does happen gently pull each thread individually to correct the problem.
Also take care to sew each stitch in the same direction to achieve a neat finish.
 Finally secure the loop to the garment with a stitch and knot the thread.
 Stitch 1/4" away from the folded edge and trim the seam allowances down to be as narrow as possible.
 Use a loop turner to turn the strap the right way.
 You now have a finished rouleau strap which should look something like this.

 Make sure the seam is on the side of the loops that won't be visible.
Stitch down the centre of the ribbon to secure the loops and trim off the loops from the opposite side.
Make sure the seam is on the side of the loops that won't be visible.
Stitch down the centre of the ribbon to secure the loops and trim off the loops from the opposite side.
 Insert the ribbon into your seam allowance before sewing the seam.
We hope you've enjoyed our little tutorial and here's to lots of pretty summer sewing!
Have fun sewing!
Lucy
For more tips and tricks on how to make sewing easy you can follow our blog via Bloglovin and receive updates via email each time a new post is added.
Follow us on Facebook Twitter YouTube and Instagram for news, tutorials, special offers, sales and more.
Insert the ribbon into your seam allowance before sewing the seam.
We hope you've enjoyed our little tutorial and here's to lots of pretty summer sewing!
Have fun sewing!
Lucy
For more tips and tricks on how to make sewing easy you can follow our blog via Bloglovin and receive updates via email each time a new post is added.
Follow us on Facebook Twitter YouTube and Instagram for news, tutorials, special offers, sales and more.