Hem Finishes On An Overlocker
A few weeks ago we shared five hand stitched hem techniques here on the blog and I promised there would be further posts on machine stitched hems and hem finishes on your overlocker. Seeing as it is now well and truly Autumn when we find ourselves reaching for the cosy knit fabrics in our stash or the fabric store (we have a good range of stretch fabrics on our site if you want to check it out) I thought we'd share the hem finishes you can achieve on your overlocker. Plus I must admit I'm currently in the throes of a long and unwavering love affair with my Babylock overlocker and can't stop raving about it having spent a little time exploring its full capabilities. If you have an overlocker or are considering buying one it is well worth spending a little time opening your eyes to the tasks you can complete on an overlocker - ironically finishing seams is merely the starting point.
Blind Hemming On An Overlocker
First up perhaps the most impressive trick of all - blind hemming on an overlocker. Yes, you heard me right, it is possible and the results are brilliant. From the right side you have the usual minimal blind hem stitches and from the wrong side you have a raw edge neatly finished with overlocking stitches. It looks so professional and means there is no need to finish the raw edge of the fabric prior to hemming because it completes both tasks in one fell swoop. Efficient and neat just the way I like things!
To achieve this hem finish on my Babylock overlocker I threaded it for a two thread overlock. I have included the threading instructions plus a video here because there doesn't seem much in the way of videos for setting up for a two thread overlock.
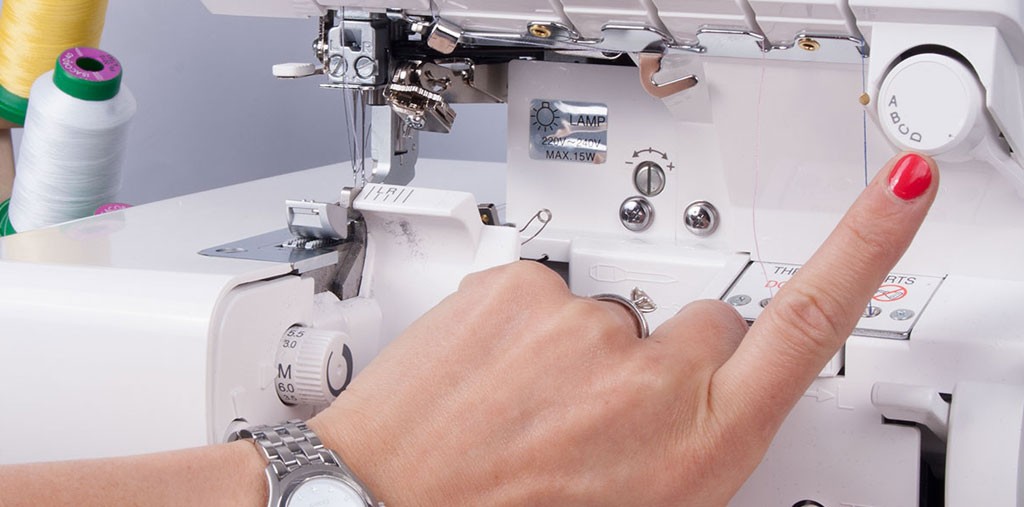
For this technique you will need to thread the right needle and the lower looper therefore remove the left needle before threading.
Start by threading the right needle - place the thread spool on the thread stand second from the left, through the telescopic guide, clicking it into place in the thread guide third from the left on top of the machine then thread the right needle in the normal way.
Next you will need to thread the lower looper in the normal way placing the thread spool on the thread stand furthest on the right and and at the front of the machine.
Once the lower looper is threaded you will need to engage the subsidiary looper, a little gadget attached to the upper looper. You simply place your finger under it and lift it up and to the left so it clicks into place across the top of the upper looper then make sure the point at the end of it clicks into the little hole on the back of the upper looper. This tricks your overlocker into thinking the upper looper is threaded.
Ensure the presser foot is down and the machine is unlocked before running a chain of stitches to check everything is working correctly.
Clearly these are the instructions on the threading technique for a two thread overlock on my particular model of overlocker, but you will probably find similarities with other models, just remember to refer to your manual. I've included a little video below for reference and clarity!
I selected option B on the stitch selector and set the stitch width to 5 and the stitch length to 4 in the standard range as per the manual. I folded up the hemline and pressed it in place and then folded the hem allowance back onto the right side of the garment leaving the raw edge of the fabric exposed by 1/4"
I lined the folded edge of the fabric up with the right needle marker leaving the raw exposed edge lying across the remainder of the right hand side of the needle plate meaning any excess fabric would be trimmed of by the blade of course.
As with any technique on your overlocker it is always wise to test on a scrap of fabric first to see how the fabric behaves and exactly where the stitches fall. You want the stitches to just catch the edge of the soft fold and you may need to adjust the differential feed up depending on the fabric you are using. Once you've done this and are happy with the results it is time to hem away.
Three Thread Overlock Narrow Hemming
Another way to finish hems using an overlocker is the three thread overlock narrow hemming technique. This is a very similar technique to the three thread rolled hem technique we shared in a previous article (see below) but rather than the hem being rolled it sits nice and flat.
This is a really simple and easy way to hem a range of fabrics and once again finishes the edges and hems the garment in one - winner!
This technique also uses the right needle so you simply set the machine up for a three thread overlock omitting the left needle and thread or remove them if you are going from a four thread to a three thread overlock and if using a Babylock machine. One of the massive advantages of Babylock machines is that they don't have to be threaded in any particular order so if a thread breaks or you want to switch between different numbers of threads it is quick and easy. For other models you may need to rethread the machine from scratch in a particular order and you should refer to your manual for instructions.
Once set for a three thread overlock with the right needle threaded I set the stitch length at 1 (within the rolled hem range) and the stitch width at 3 and chose option C on the stitch selector.
As always I tested a scrap of fabric first and adjusted the differential feed up to prevent any fluting of the stretch fabric I was using and simply lined the raw edge of the fabric up with the edge of the stitch plate.
As you can see this technique creates a decorative, neat finish quickly and easily - what's not to love?!
Three Thread Rolled Hem
The three thread rolled hem is very similar to the three thread overlock narrow hemming technique the only difference being, yes you guessed it, the edge of the fabric is rolled over slightly. This technique produces a really pretty hem finish particularly suited to fine fabrics and is much easier to achieve on an overlocker than by hand or with a sewing machine. For full details on how to create this hem finish and other handy tips and techniques for your overlocker visit our previous article here.
Lettuce Edge Rolled Hem
The lettuce edge rolled hem is another pretty, decorative way to hem your garments creating a fluted or wavy edge to the fabric. If you're someone who likes to follow current trends this effect ties in beautifully with the 'ruffles' theme which strongly prevailed on the Autumn Winter 2016 catwalks and is a great way to add an interesting bit of feminine detail to your latest project. I've spotted the lettuce edge on a wide range of garments in my favourite shops recently - a particular favourite of mine was a lettuce edge neckline and cuffs on an otherwise plain and simple turtleneck, but it is a pretty addition to any garment. I shared a video and some detailed instructions on how to create a lettuce edge on your overlocker here plus other tips and techniques you might find useful.
So there you have it, four quick, easy ways to hem your garments and finish the edges in one swift movement - well worth taking the time to have a play around.
Have fun sewing!
Lucy
For more tips and tricks on how to make sewing easy you can follow our blog via Bloglovin and receive updates via email each time a new post is added.
Follow us on Facebook Twitter and Instagram for news, tutorials, special offers, sales and more.