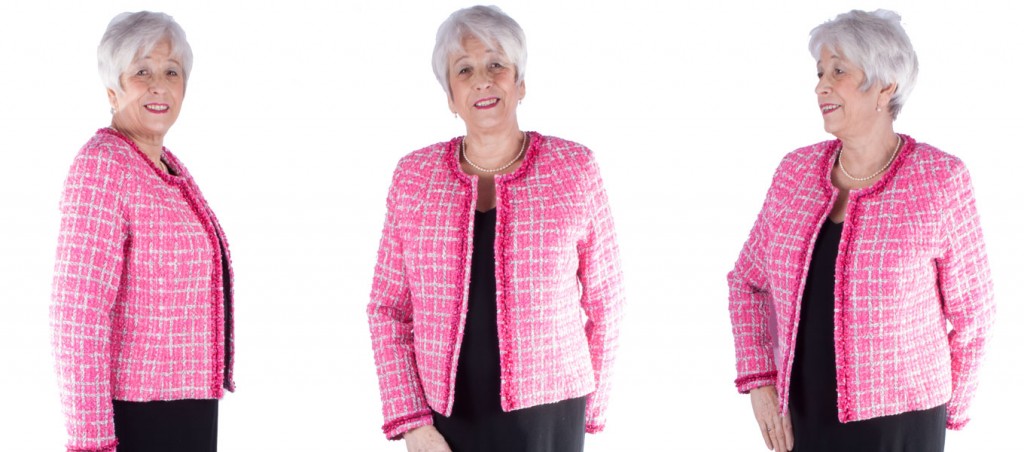
Following on from our six most iconic vintage dress patterns post we’ve got a fabulous make for you to feast your eyes on. Angela has certainly channelled her inner Jackie Kennedy with this one and has created the most beautiful hot pink Chanel style jacket using the
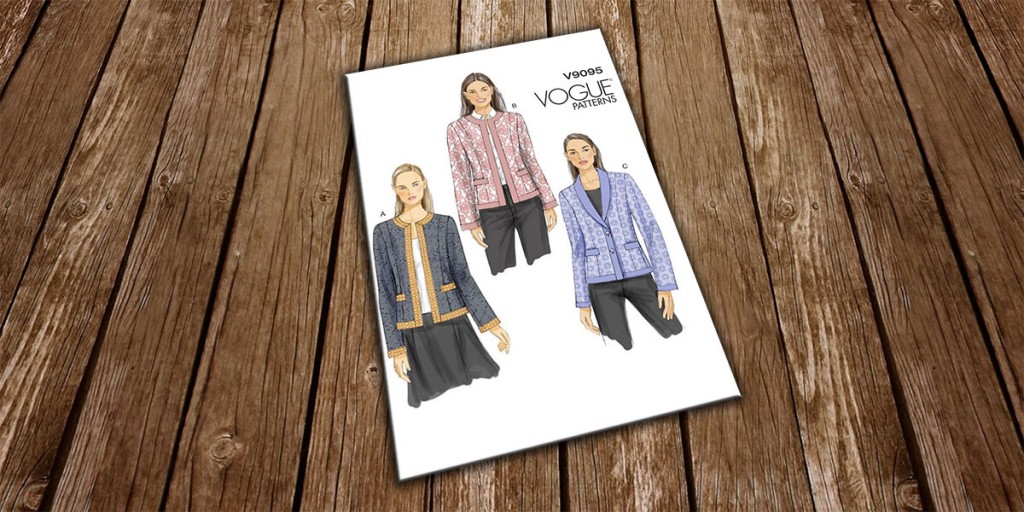
Vogue 9095 sewing pattern (view A). The pink is bang on trend for spring summer 2016, but the silhouette is timeless and classic. Here she shares her tips and tricks for successful tailoring, a professional finish and those all important finishing touches that will make your efforts look haute couture for sure daaaaahling! Now over to Angela:
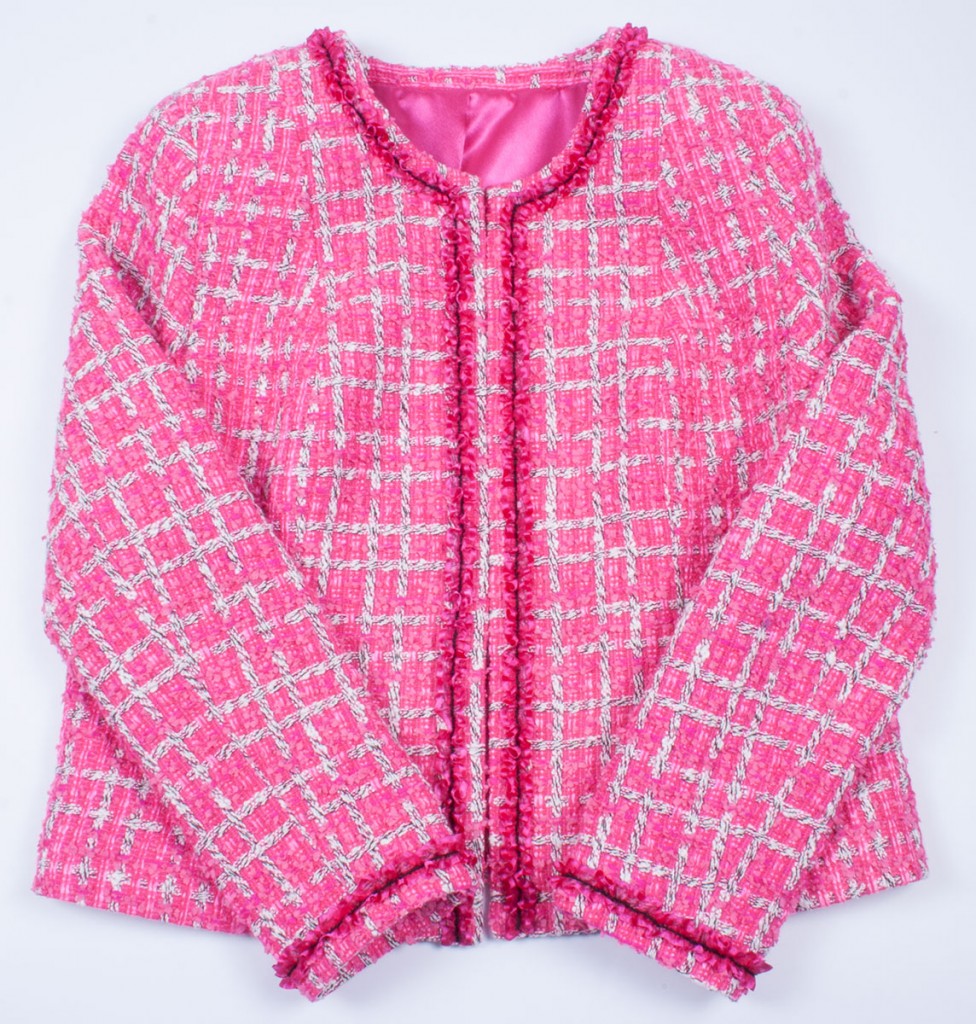
I bought the delightful pink tweed fabric from Linton Tweeds who specialise in couture dressmaking fabric and supply a range of top fashion houses. As we all know preparing your fabric is crucial to success. For fabrics such as tweed and wool made from natural fibres it is advisable to shrink it before use. I did this by laying the fabric on a flat surface and hovering my steam iron over it until it was damp to the touch then left it to dry.
When cutting the fabric it was crucial to ensure the checks matched when laying out the pattern pieces. Rather than folding the fabric and cutting out two pieces at once I cut out one piece first, matched it and then flipped the pattern piece over to cut the next piece.
Next I stay stitched any curved or v shaped lines such as arm and neck holes to prevent distortion. I then laid the pattern piece on the fabric again to make sure the fabric hadn’t distorted. If necessary you can use the stay stitches to reshape the fabric back into place and use some steam and pat it flat to regain the correct shape then leave it to dry.
Most tweeds are very open weave and can snag easily so I recommend interfacing them with an iron on
medium weight cotton interfacing (available in cream or black) to prevent any snagging. I find it is better to apply the interfacing after cutting the fabric so it doesn’t hinder your ability to pattern match the fabric during cutting.
Now onto some tailoring tips! Sewing patterns won’t always suggest creating and using a chest piece, but it is easy to do and well worth the minimal effort required to achieve a more professional finish. The purpose of a chest piece is to fill the hollow between the shoulder and the bust point to give a smooth finish. You can easily draw one yourself by following the lines of the armhole and shoulder seam from your pattern piece. I quickly mocked one up for the purposes of this post (see below) so it doesn’t fit my jacket perfectly, but it will if you use your pattern piece as a guide. It is best to make the chest piece out of lightweight canvass or
fleece, which will give your jacket lovely structure. Simply stitch the chest piece into the shoulder and arm hole seams before you assemble the jacket.
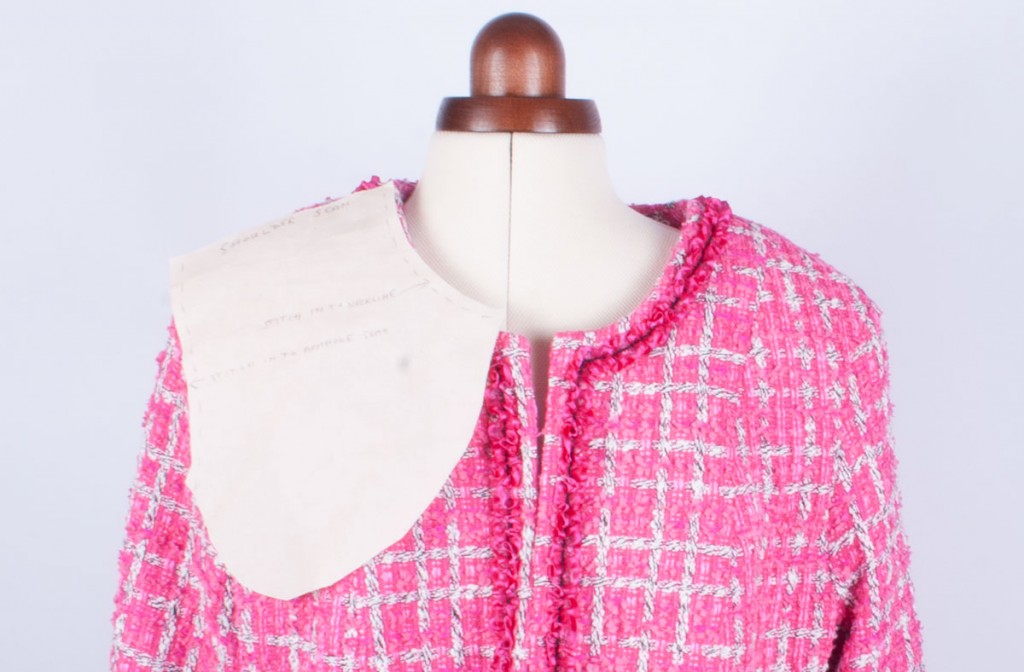
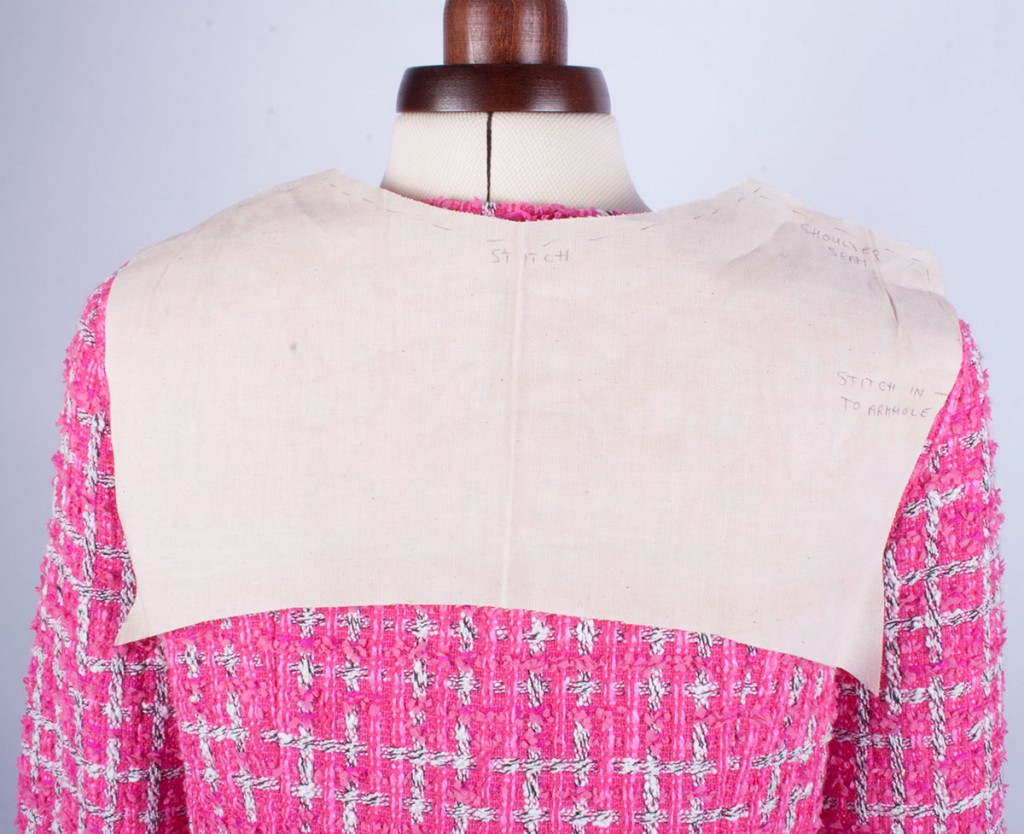
It is also useful to create a piece to run across the top of your back and shoulders since this will support the jacket, the shoulder seam and the sleeve and give structure and body to the neck and shoulder area. Once again use the relevant pattern piece to draw the required shape onto lightweight canvass or fleece following the lines of the armholes and shoulder seam shaping in a slight curve towards the centre of your back as in the photo below.
As with all dressmaking I pressed the jacket at every stage using lots of steam and, yes, I realise I am probably teaching my granny to suck eggs here!
After I inserted the sleeves I added sleeve heading to give the top of the sleeves structure and prevent them from falling flat. I did this by creating a half moon shape in fleece using the sleeve pattern piece and hand sewing it into place at the sleeve head.
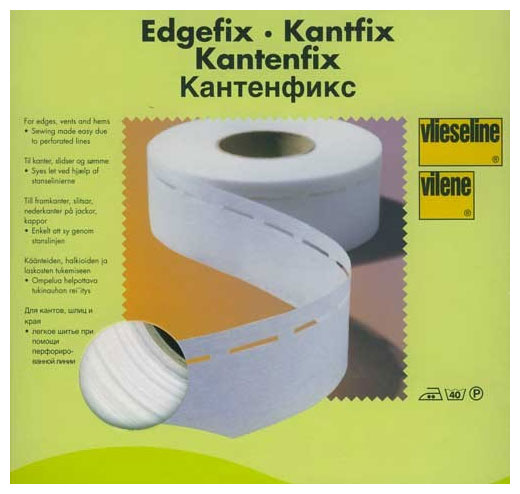
To give the bottom of the jacket and the cuffs structure I used iron on Edgefix tape by Vilene. This amazing stuff comes with perforated holes which separate a wide and a narrow section of the Edgefix as in the photo below. I lined the edge of the widest part up with the raw edge at the bottom of the sleeve and pressed it into place. I then folded along the perforated strip on the Edgefix to create the cuff and pressed along the fold. Finally I hand stitched the seam allowance into place.
Once the jacket was constructed I inserted
shoulder pads by hand stitching them into place along the shoulder seam line and loosely securing the tips into the armhole seams to stop them moving. A useful tip for securing the tips of the shoulder pads into the armhole seams is to sew a very narrow strip of
ribbon onto the tips of the shoulder pads and sew the ribbon into the seams. Following these recommendations will mean the shoulder pads will be secure, but will also allow for movement which is crucial when wearing your jacket! Dressmaking through the 80s helped me to pick up these tips!
When lining the jacket I chose a satin lining because this makes it easier to get your arms down the sleeve whereas matt fabrics can make it more difficult.
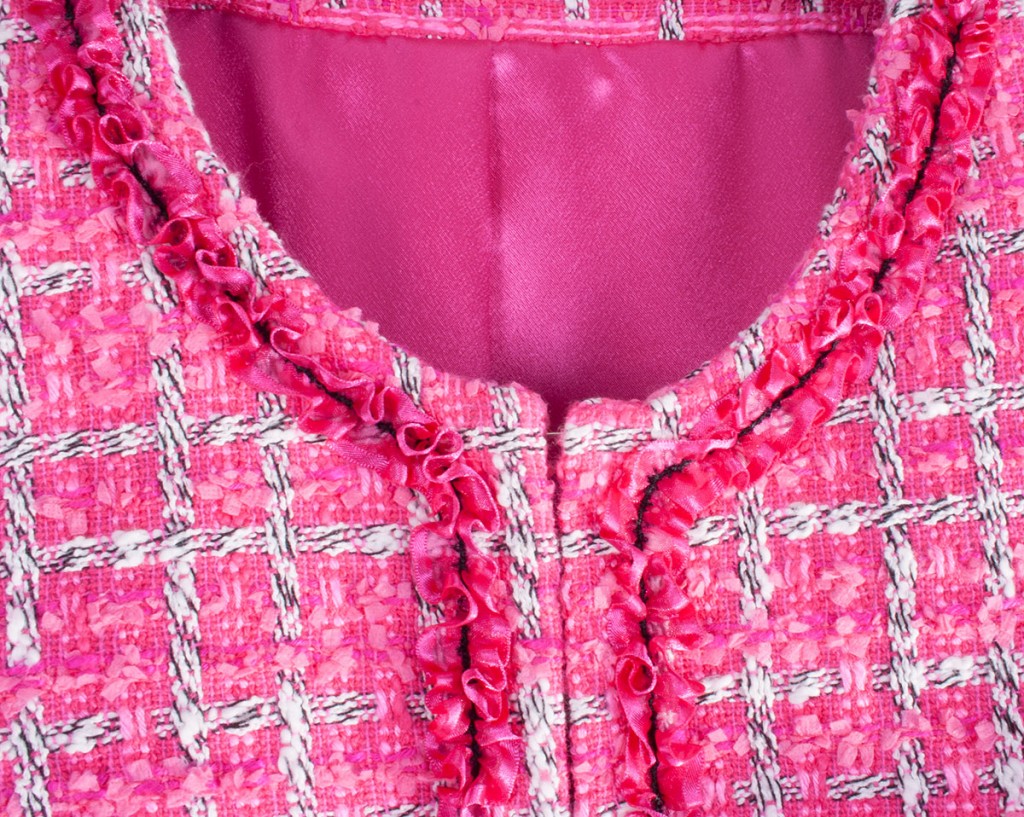
Finally I didn’t have enough fabric left over to make the traditional fringe trimming and couldn’t find any to match so I used this
organdie ribbon with a satin edge to create my own. I took a thin black cord about 1mm wide and ran it down the middle of the ribbon using a
three hole yarn foot (my machine is a Husqvarna, but other brands of machine will have something similar) and a zig zag stitch. I pulled the cord to gather the ribbon then went over it with a narrower zig zag stitch to fix the cord in place then hand stitched the finished trimming onto the jacket.

I have to say I thoroughly enjoyed making this jacket, but wasn’t so keen on the photoshoot! However, Lucy persuaded (railroaded) me into it and managed to make me laugh so it wasn’t so bad in the end! Plus it is all for the greater good of the blog and hopefully you’ve all enjoyed the post!
Have fun sewing!
Angela (and Lucy)
For more tips and tricks on how to make sewing easy you can follow our blog via
Bloglovin and receive updates via email each time a new post is added.
Follow us on
Facebook and
Twitter for news, tutorials, special offers, sales and more.
 I bought the delightful pink tweed fabric from Linton Tweeds who specialise in couture dressmaking fabric and supply a range of top fashion houses. As we all know preparing your fabric is crucial to success. For fabrics such as tweed and wool made from natural fibres it is advisable to shrink it before use. I did this by laying the fabric on a flat surface and hovering my steam iron over it until it was damp to the touch then left it to dry.
When cutting the fabric it was crucial to ensure the checks matched when laying out the pattern pieces. Rather than folding the fabric and cutting out two pieces at once I cut out one piece first, matched it and then flipped the pattern piece over to cut the next piece.
I bought the delightful pink tweed fabric from Linton Tweeds who specialise in couture dressmaking fabric and supply a range of top fashion houses. As we all know preparing your fabric is crucial to success. For fabrics such as tweed and wool made from natural fibres it is advisable to shrink it before use. I did this by laying the fabric on a flat surface and hovering my steam iron over it until it was damp to the touch then left it to dry.
When cutting the fabric it was crucial to ensure the checks matched when laying out the pattern pieces. Rather than folding the fabric and cutting out two pieces at once I cut out one piece first, matched it and then flipped the pattern piece over to cut the next piece. It is also useful to create a piece to run across the top of your back and shoulders since this will support the jacket, the shoulder seam and the sleeve and give structure and body to the neck and shoulder area. Once again use the relevant pattern piece to draw the required shape onto lightweight canvass or fleece following the lines of the armholes and shoulder seam shaping in a slight curve towards the centre of your back as in the photo below.
 As with all dressmaking I pressed the jacket at every stage using lots of steam and, yes, I realise I am probably teaching my granny to suck eggs here!
After I inserted the sleeves I added sleeve heading to give the top of the sleeves structure and prevent them from falling flat. I did this by creating a half moon shape in fleece using the sleeve pattern piece and hand sewing it into place at the sleeve head.
To give the bottom of the jacket and the cuffs structure I used iron on Edgefix tape by Vilene. This amazing stuff comes with perforated holes which separate a wide and a narrow section of the Edgefix as in the photo below. I lined the edge of the widest part up with the raw edge at the bottom of the sleeve and pressed it into place. I then folded along the perforated strip on the Edgefix to create the cuff and pressed along the fold. Finally I hand stitched the seam allowance into place.
As with all dressmaking I pressed the jacket at every stage using lots of steam and, yes, I realise I am probably teaching my granny to suck eggs here!
After I inserted the sleeves I added sleeve heading to give the top of the sleeves structure and prevent them from falling flat. I did this by creating a half moon shape in fleece using the sleeve pattern piece and hand sewing it into place at the sleeve head.
To give the bottom of the jacket and the cuffs structure I used iron on Edgefix tape by Vilene. This amazing stuff comes with perforated holes which separate a wide and a narrow section of the Edgefix as in the photo below. I lined the edge of the widest part up with the raw edge at the bottom of the sleeve and pressed it into place. I then folded along the perforated strip on the Edgefix to create the cuff and pressed along the fold. Finally I hand stitched the seam allowance into place.

 I have to say I thoroughly enjoyed making this jacket, but wasn’t so keen on the photoshoot! However, Lucy persuaded (railroaded) me into it and managed to make me laugh so it wasn’t so bad in the end! Plus it is all for the greater good of the blog and hopefully you’ve all enjoyed the post!
Have fun sewing!
Angela (and Lucy)
For more tips and tricks on how to make sewing easy you can follow our blog via Bloglovin and receive updates via email each time a new post is added.
Follow us on Facebook and Twitter for news, tutorials, special offers, sales and more.
I have to say I thoroughly enjoyed making this jacket, but wasn’t so keen on the photoshoot! However, Lucy persuaded (railroaded) me into it and managed to make me laugh so it wasn’t so bad in the end! Plus it is all for the greater good of the blog and hopefully you’ve all enjoyed the post!
Have fun sewing!
Angela (and Lucy)
For more tips and tricks on how to make sewing easy you can follow our blog via Bloglovin and receive updates via email each time a new post is added.
Follow us on Facebook and Twitter for news, tutorials, special offers, sales and more.