Essential Patchwork and Quilting Toolkit Part 1

Ever fancied having a go at quilting, but not sure what you need to get started? Already a quilter, but sometimes wonder whether you’re using the right tools and equipment? You’re in luck - our resident patchwork and quilting guru Joan is here to help you! Joan has written a series of informative posts where she goes right back to basics and explains the reasons why certain tools are preferable to others, what they are useful for and how you will use them. Even those of you who are experienced quilters and patchwork fans may benefit from a read since it easy to fall into a habit of using certain methods without ever considering an alternative. As with all sewing and crafts using the right tools can take the experience from stressful, difficult and frustrating to easy, fun and enjoyable! You never know we might just share something that could make your life a whole lot easier!
Needles
Hand Piecing, Quilting and Applique

I find it is better and more economical to buy packets of needles in a single size. In the mixed size packets you will often find there are only a couple of sizes you regularly use.
I always use a size 10/70 or 11/75 needle as they are tiny and result in a smaller, more invisible stitch result, though some people may find a needle threader useful! (Make sure it's a fine one though - I recommend this Clover version) . Sharps are better for for piecing and applique, whilst betweens are better for quilting. I usually use the Clover brand which are a very short, very fine needle and as above I recommend between a size 10-12 to make it possible to achieve very tiny stitches.
Machine Piecing
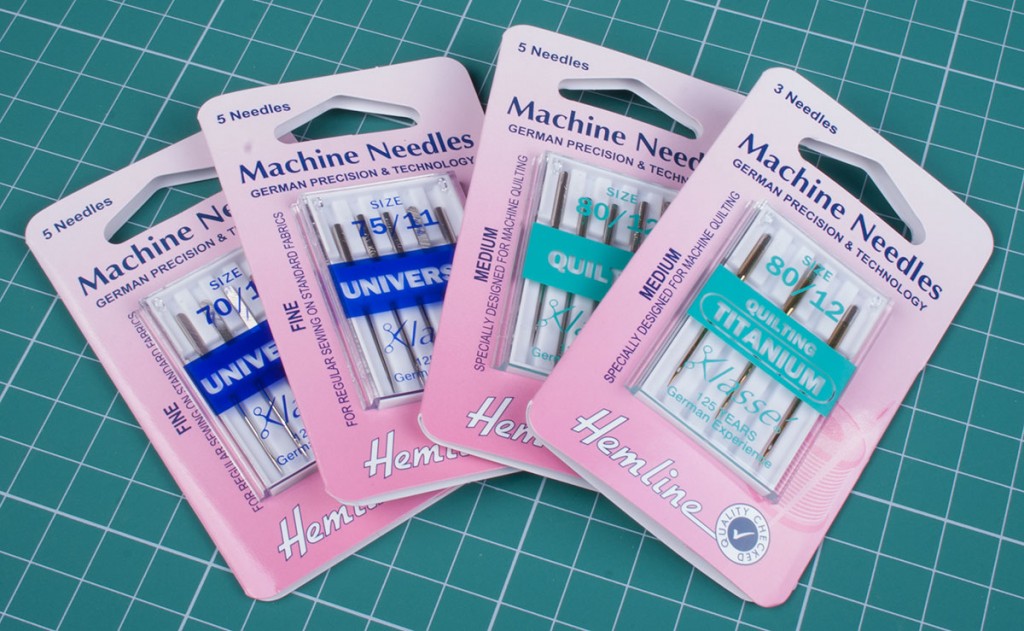
When machine piecing I use a size 10/70 or 11/75 needle for medium weight cottons, and change it after about 6-8 hrs sewing so it remains sharp otherwise it can blunt and snag or skip stitches. For quilting I recommend these quilting machine needles again in a size 10/70 or 11/75. Also, I would never consider doing any machine piecing without a 1/4" sewing machine foot since you need straight seams that are exactly 1/4" (6mm ) from the needle for accurate patchwork. A walking foot is also useful for the quilting stage, but we will cover that later.
Pins

Pinning the pieces together accurately is a very important aspect of patchwork and the right choice of pins can make it so much easier to do. Equally, choosing the wrong pins can make life very difficult.
There are an infinite range of pins available and this can make it incredibly confusing for the beginner, but fear not we’re here to help you understand the options available!
Some quilters favour long, coloured glass headed pins as they show up well against the fabric. Others prefer long fine dressmakers pins, which are not so obvious meaning more care is needed to ensure they are all removed before layering, but are a little bit finer than the glass headed pins.
Flower headed pins are very popular since they show up very well against the fabric, however, they will melt under a hot iron! Also if leaving them in whilst machining the pieces together they can easily be machined into the project – hard to believe I know, but believe me it happens, I have done it!
My own personal choice of pins are the Clover Quilting Pins (Fine) and the Clover Patchwork pins. These pins are more expensive than many of the alternative options, but don’t let that put you off! They really are an excellent choice as they are very smooth and fine, do not impede the machine if left in whilst sewing (which lots of quilters do, although we really shouldn't) and have glass heads that do not melt when ironed. I call them my 'precious' pins, used only for patchwork, as they really are the Rolls Royce of patchwork necessities!
I find when piecing with these it is so easy to get joints to butt up together without that awful 'not quite matched' look which results in either unpicking if you are a perfectionist like me, or having a finished piece of work that you are not quite happy with.
Also, the price can be forgiven at home, because as they are so 'precious' I make sure I pick them up if I drop them so they don't get lost or end up stuck in my Husband’s feet!
Thread

When sewing cotton fabrics, I personally prefer 100% cotton thread. An alternative to this is a polyester cotton thread such as Gutermann Sew All. So how do you decide which thread type is best for you? Well it all depends on the purpose of the quilt...
100% cotton thread is suitable for quilts you will use on a daily basis or quilts that you would like to keep forever because it will wear at the same rate as the cotton fabric. Polyester thread, on the other hand, won’t wear as quickly as the fabric and will actually eat into the fabric over time therefore should only be used for everyday quilts you are not expecting to last forever.
When choosing thread colour, if it is not possible to get an exact match, always choose a darker rather than a lighter shade, as it will be less visible. Our thread wound Gutermann shade cards are an excellent reference tool when choosing thread colours and are available for the Sew-All polyester thread and Natural Cotton and Quilting thread.
For hand quilting, I use a pure cotton waxed thread produced especially for this purpose, being thicker and stronger. It is waxed to make it smooth and to reduce tangling.
Fabric Markers
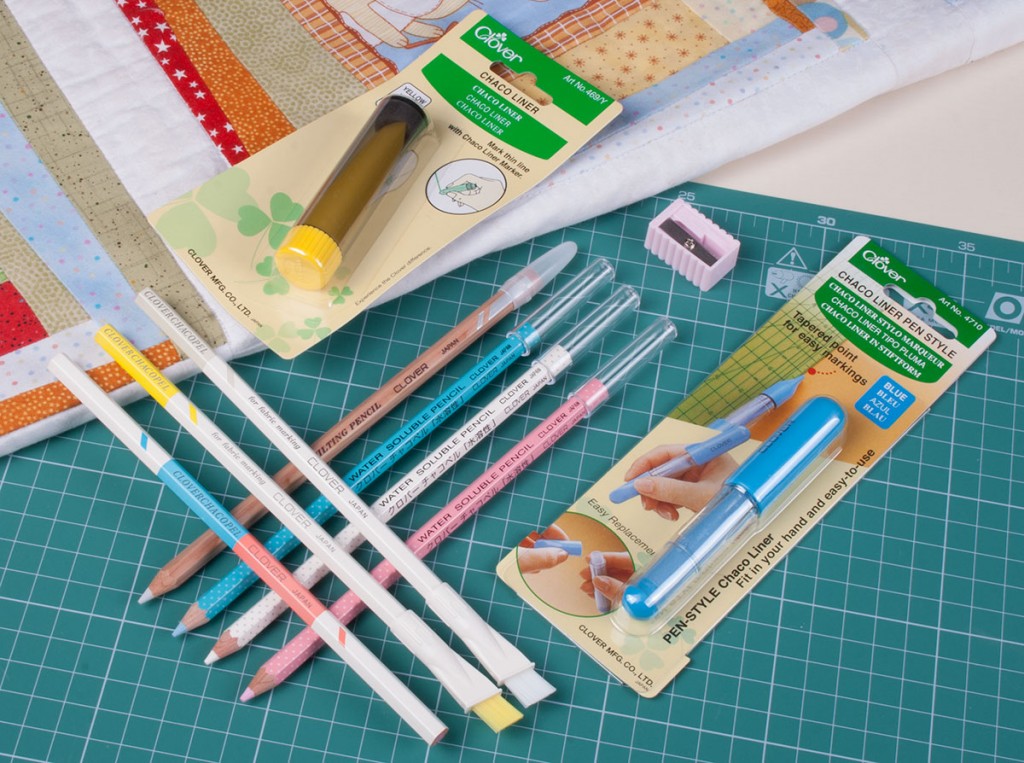
There are various types of fabric markers available. When choosing a marker to use on a quilt it is better to test it on a spare piece of fabric first to ensure that the marks it makes are easily removable, or, in the case of markers used for quilting lines, do not vanish too quickly.
Types of marker include air soluble, water soluble or chalk based. There are also coloured pencil markers which can be sharpened to create a very fine point and can be erased with a special fabric eraser.
Try and use a similar shade to the fabric that is still easily visible. I once used a pink chalk marker on a cream fabric and couldn't remove the chalk, resulting in a lot of extra work!
Thimbles

Thimbles come in a huge variety of designs. I personally never used to use one at all, whilst others would never sew without one. However, all too often, I have ended up with very sore fingers through not using a thimble when hand piecing or quilting. This can take several days to return to normal, making sewing quite painful and, let’s face it, nobody wants this do they?! If I’m being good and I do wear one I prefer the leather ones with the metal insert such as the Clover double sided thimble over anything else because they are more flexible and fit more snugly round your finger.
So there you have it, you’re now an expert in pins, needles, thread, fabric markers and thimbles!
Watch out for the next posts from me which will help you to choose the rest of your essential patchwork and quilting toolkit, coming soon!
Have fun sewing!
Joan
For more tips and tricks on how to make sewing easy you can follow our blog via Bloglovin and receive updates via email each time a new post is added.
Follow us on Facebook and Twitter for news, tutorials, special offers, sales and more.