
A couple of weeks ago we introduced you to overlockers and, as promised, today we're going to share some great uses for your overlocker beyond finishing the raw edges of your garment. Overlockers really can take your sewing to the next level in terms of achieving a very professional finish quickly and easily, which is why you saw them used so frequently in the Great British Sewing Bee this year.
1. Making Straps For a Summer Dress
This is a great little trick that not only joins the raw edges of your fabric together to create the strap, but also gives you an easy solution for turning the straps through.
- Create a chain of stitches longer than your strap fabric and leave them attached to your machine.
- Hold the strap length ways, right side up and place the chain of stitches down the centre of the fabric with the free end hanging past the bottom of the strap.
- Line up the raw edges of your fabric and overlock from the top to the bottom of the strap making sure the chain of stitches does not get caught in the stitches you are now creating. Also ensure your stitch width is narrow enough to allow you to turn the strap through once you have finished.
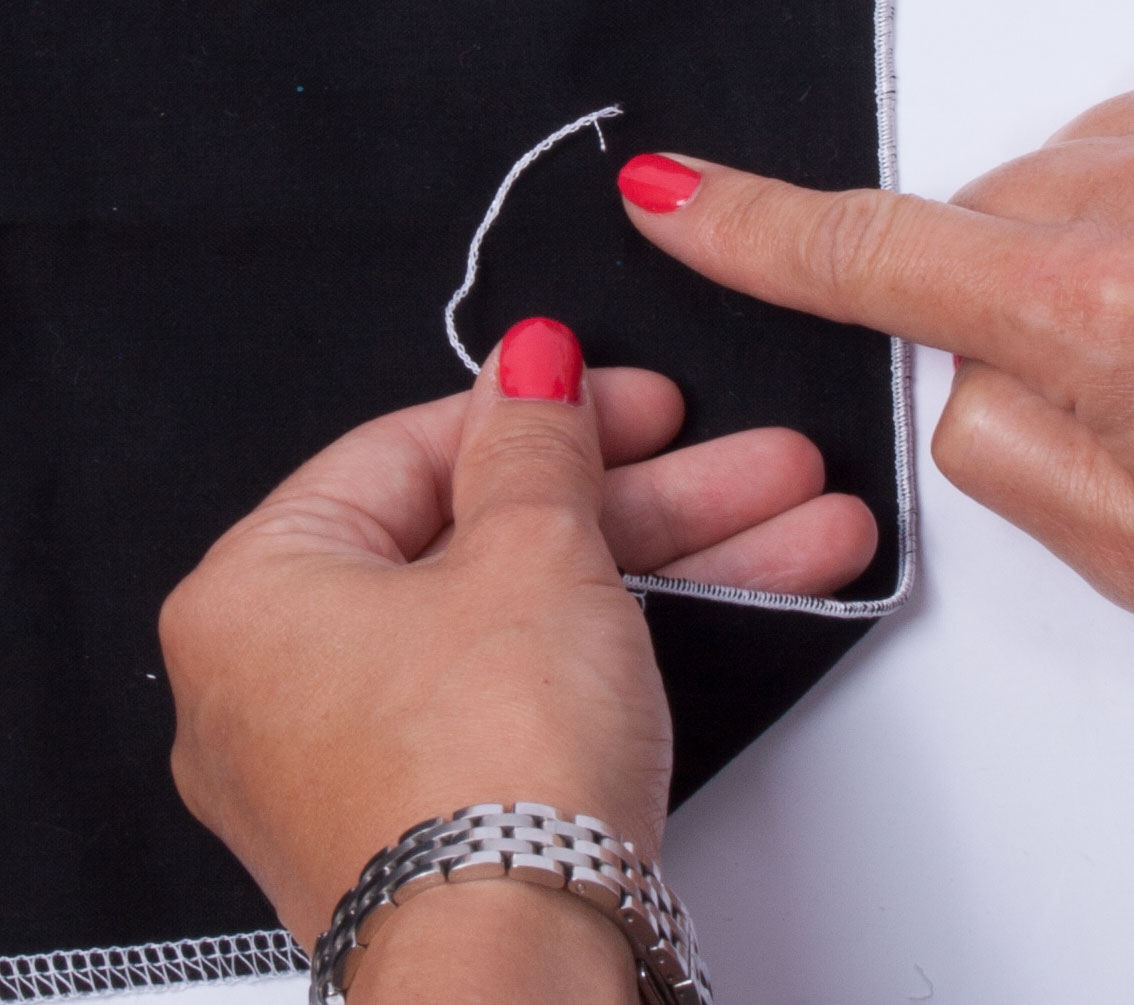
- Remove the strap from the overlocker and use the chain of stitches hanging from the bottom of the strap to gently pull the strap through to the right side. Take care not to break the chain of stitches by pulling too hard! It may also help to use a knitting pin or something similar to poke the fabric through at the top end to get it started depending on how narrow your strap is.
2. Joining The Seams Of A Garment
This is a great way to use your overlocker - instead of finishing the edges of your fabric and then stitching your seam you complete both tasks at once. If, like me, you've ever used the overlocking stitch on your sewing machine to finish the raw edges of garments you will reallyappreciate the time this will save you. Not only do you save time on completing two tasks at once, but the overlocker also stitches sooooo much more quickly than a sewing machine. I actually used to fear I would nod off whilst I used the overlocking stitch on my sewing machine and regularly made mistakes because I would get bored and start day dreaming - no chance with the overlocker, blink and you've missed it. Plus it does trim the excess fabric off as you stitch so you haveto concentrate because there's no going back if go off piste.
This is particularly useful when working with knit or jersey fabrics because the overlocker stitches have more elasticity than stitches created on a sewing machine. Knit and jersey fabrics will stretch as you move and bend therefore the stitches need to be able to cope with this movement too otherwise you could pop a seam and suffer a wardrobe malfunction, perish the thought! An overlocker also handles the fabric brilliantly as long as you have the settings correct so you don't have to think about feeding it through evenly or avoiding stretching it like you would with a sewing machine.
- First you will need to test the seam allowance on a scrap of fabric to identify which markings to line the edge of your fabric up with to achieve the right sized seam allowance.
- Fold a scrap of the fabric you will be using in half or pin two pieces together so you are testing on the same thickness you will actually be working with.
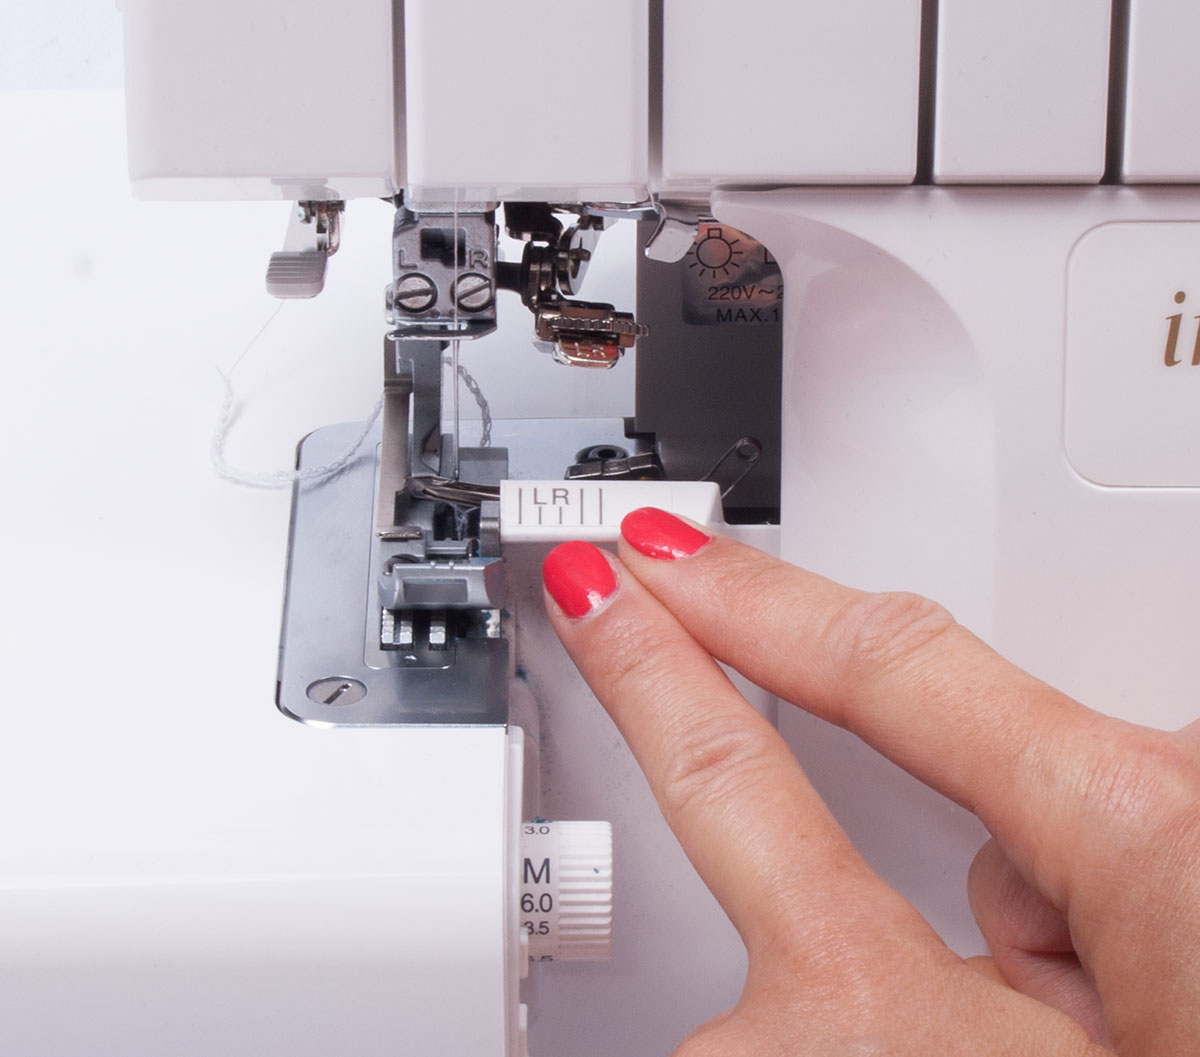
- Set the stitch width and length and differential feed to the 'standard' or 'normal' settings for your machine.
- Line the raw edge of the fabric up with one of the line markings you will find at the right hand side of the needle.
- Stitch from top to bottom, keeping the fabric aligned with your marking throughout.
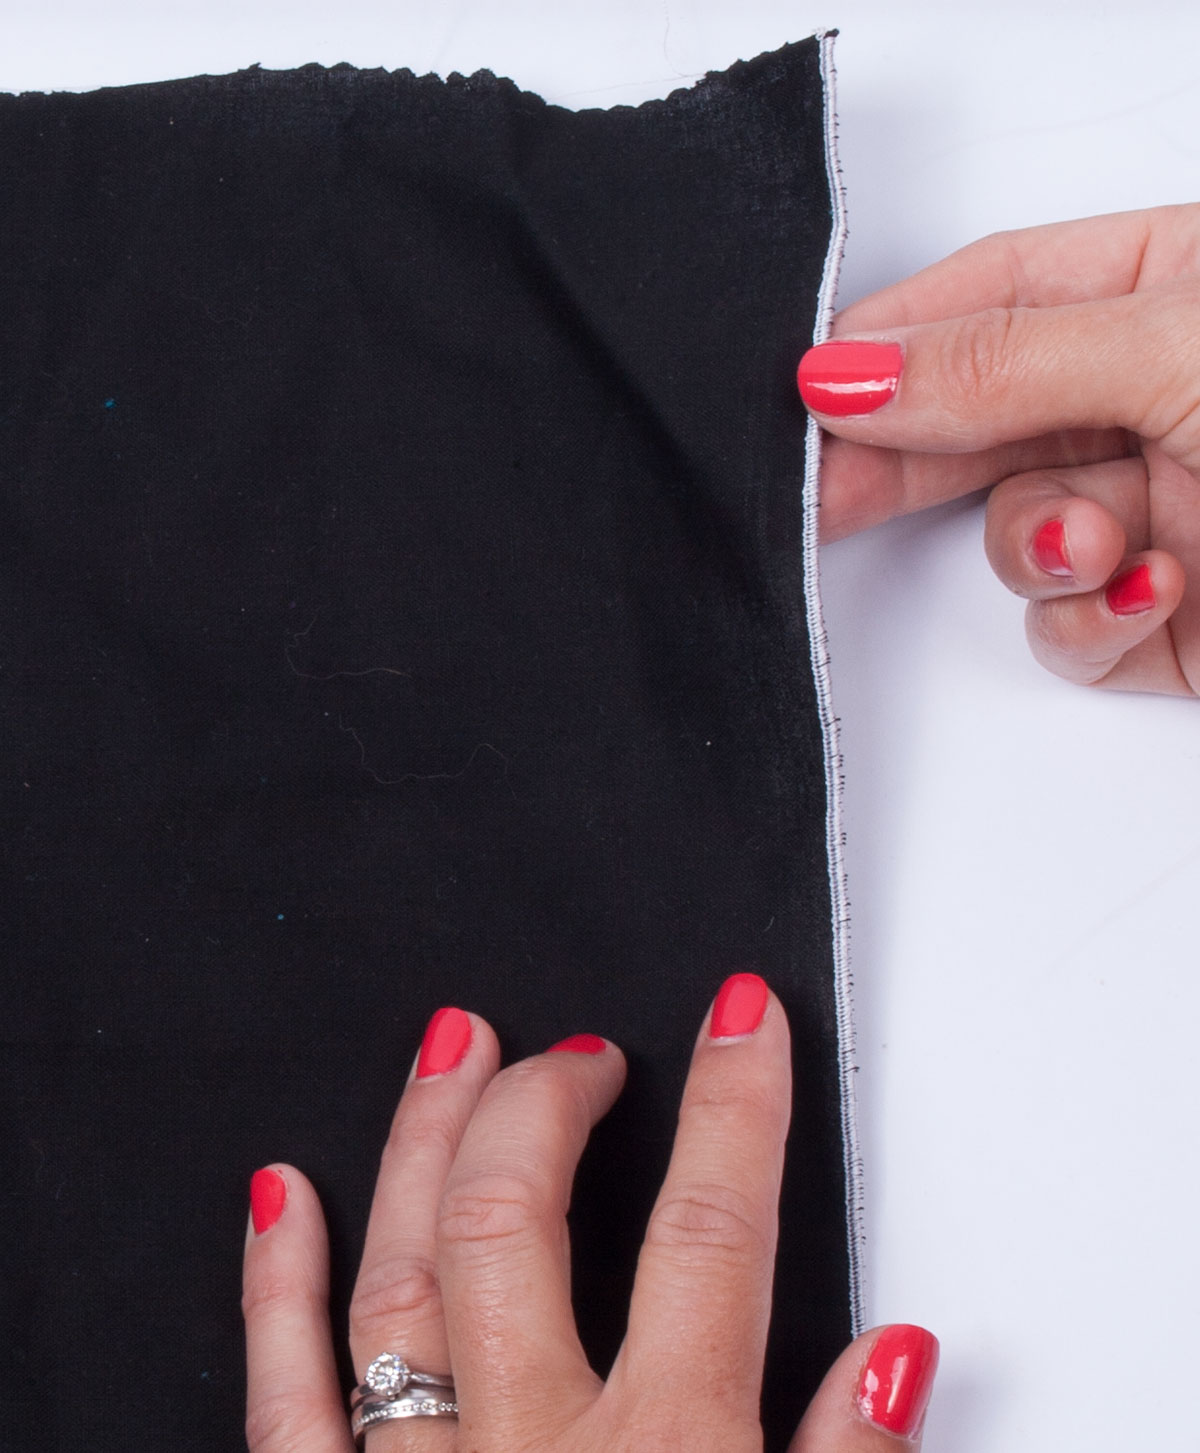
- Check the seam is nice and flat and straight by holding it at one end and looking at the raw edge head on. If it is slightly wavy/fluted you will need to adjust your differential feed up to prevent the fabric from being stretched. Continue testing until you are happy.
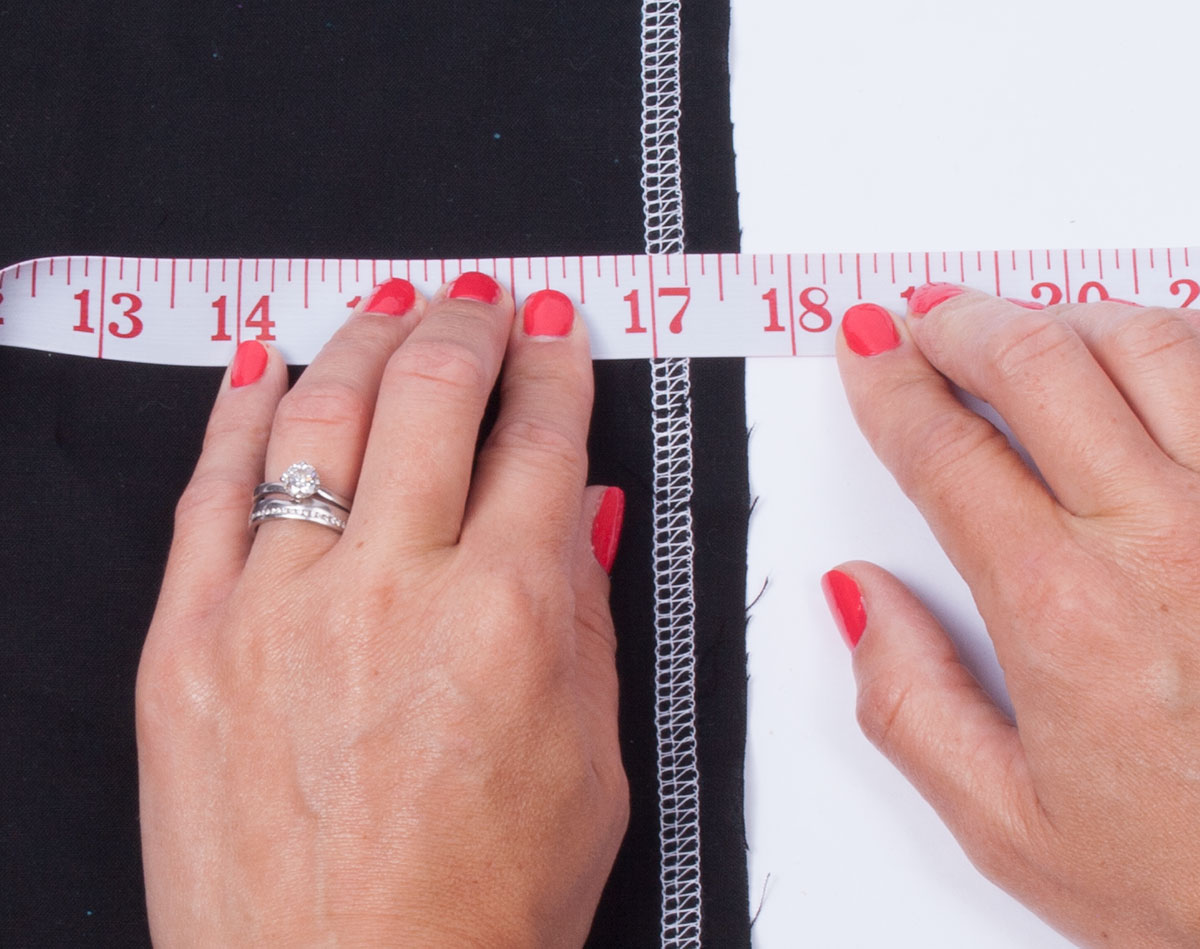
- Take the stitched piece of fabric and lie it next to the excess fabric that was trimmed off by the overlocker blade and measure from the edge of the excess to the far edge of the stitches to determine the seam allowance. If it is too wide or narrow choose another marking and test again until you achieve the right seam allowance. The image below shows a 5/8" seam allowance.
3. Creating A Three Thread Rolled Hem
Rolled hems are a lovely decorative finish perfect for delicate, sheer and lightweight fabrics such as silk or chiffon and also knits. Rolled hems can be created on a sewing machine, but are much easier to create on an overlocker.
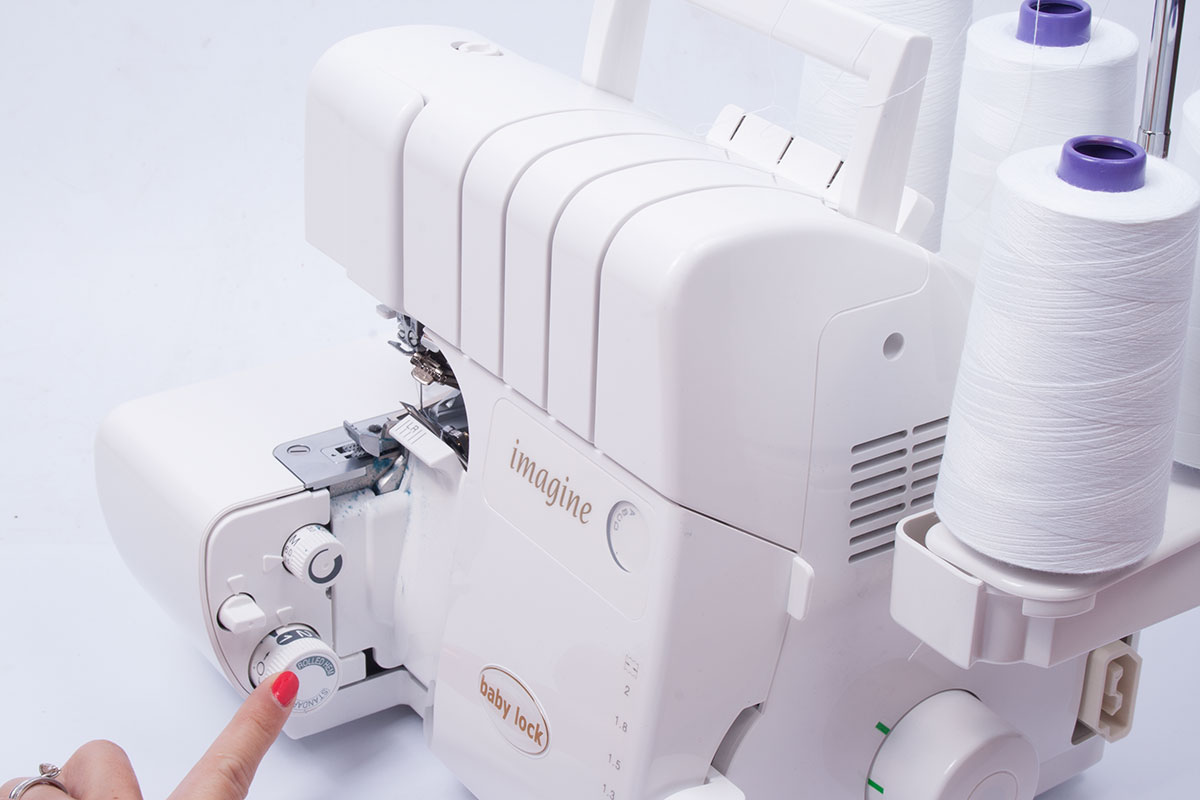
- Check your overlocker manual to identify which needle to remove when working with three threads. On my Babylock Imagine it is the left needle that should be removed, but this may vary depending on your particular brand and model.
- Remove the relevant needle.
- Select the rolled hem setting on the stitch width dial if you have one, select a narrow stitch width if you don't.
- Use a normal overlocking thread in your needle.
- You can use a decorative thread or a normal overlocking thread in your loopers, but we would recommend using the same in both loopers. A Gutermann sulky thread has a nice sheen or if you are working with knits you can use a wooly nylon thread, which stretches and recovers well, feels softer and gives better coverage.
- As always test this technique on a scrap of the same fabric you will actually be using to ensure you are happy with the results before working on the actual garment. If the fabric seems to be fluting your overlocker is stretching it and you need to adjust the differential feed up as above.
4. Creating Delicate Belt Loops And Button Loops
You know those delicate little belt loops you get on a summer dress or the pretty little button loops you might want to use on a feminine blouse? Here's how you can create them: simply follow the steps above for a three thread rolled hem and run off a chain of stitches as long as you need them then cut down to size and attach to your garment - easy! If you use a heavy decorative thread in the loopers it will make the loops stronger.
5. Creating A Lettuce Edge Rolled Hem
This is another pretty finish perfect for delicate fabrics and feminine garment designs.
- Follow steps 1 - 5 above.
- Test on a scrap of the actual fabric you will be using, but this time you wantthe overlocker to stretch your fabric so you will want to move the differential feed down.
- When you remove the fabric from the machine it should be fluted and wavy.
- Pull the fabric gently at regular intervals along the rolled hem to exaggerate the wave and create a lettuce edge rolled hem.
It is easy to avoid trying new techniques if you are short on time or frightened of making mistakes, but setting aside an hour to have a play around and practice these techniques will pay dividends in your future sewing projects. If you don't have an overlocker we hope we've given you a taster of some of the many benefits to owning one. As always if you need any advice we are always happy to help, just give us a call or drop us an email.
Have fun sewing!
Lucy
For more tips and tricks on how to make sewing easy you can follow our blog via Bloglovin and receive updates via email each time a new post is added.
Follow us on Facebook Twitter and Instagram for news, tutorials, special offers, sales and more.